Automation
How to Create a New Automated Workflow
Written By:
Overview
Creating an automated workflow in DocuFast allows you to record a real process once and reuse it whenever needed. DocuFast captures every step as you work and turns it into a reusable automatization.
Follow the steps below to create your first automated workflow.
Steps
Step 1: Open the DocuFast Extension
Start by opening the DocuFast browser extension.

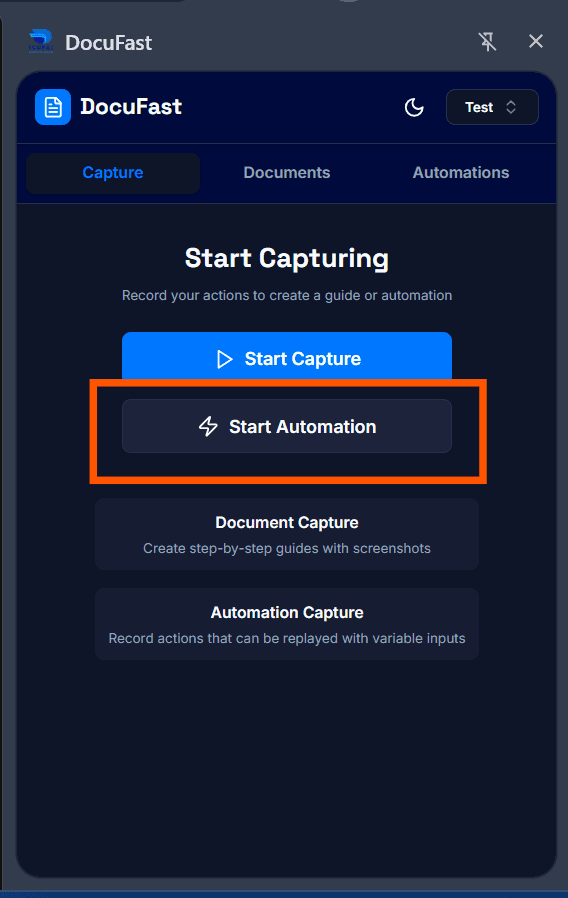
Step 2: Start a New Automation
Click the Start Automation button. DocuFast will begin recording your actions immediately. Once recording starts, everything you do becomes part of the automated workflow.
Step 3: Perform the Workflow as Usual
Continue working exactly as you normally would. Complete each step in the correct order and avoid unnecessary actions to keep the workflow clean
As you work, DocuFast records every step in real time.
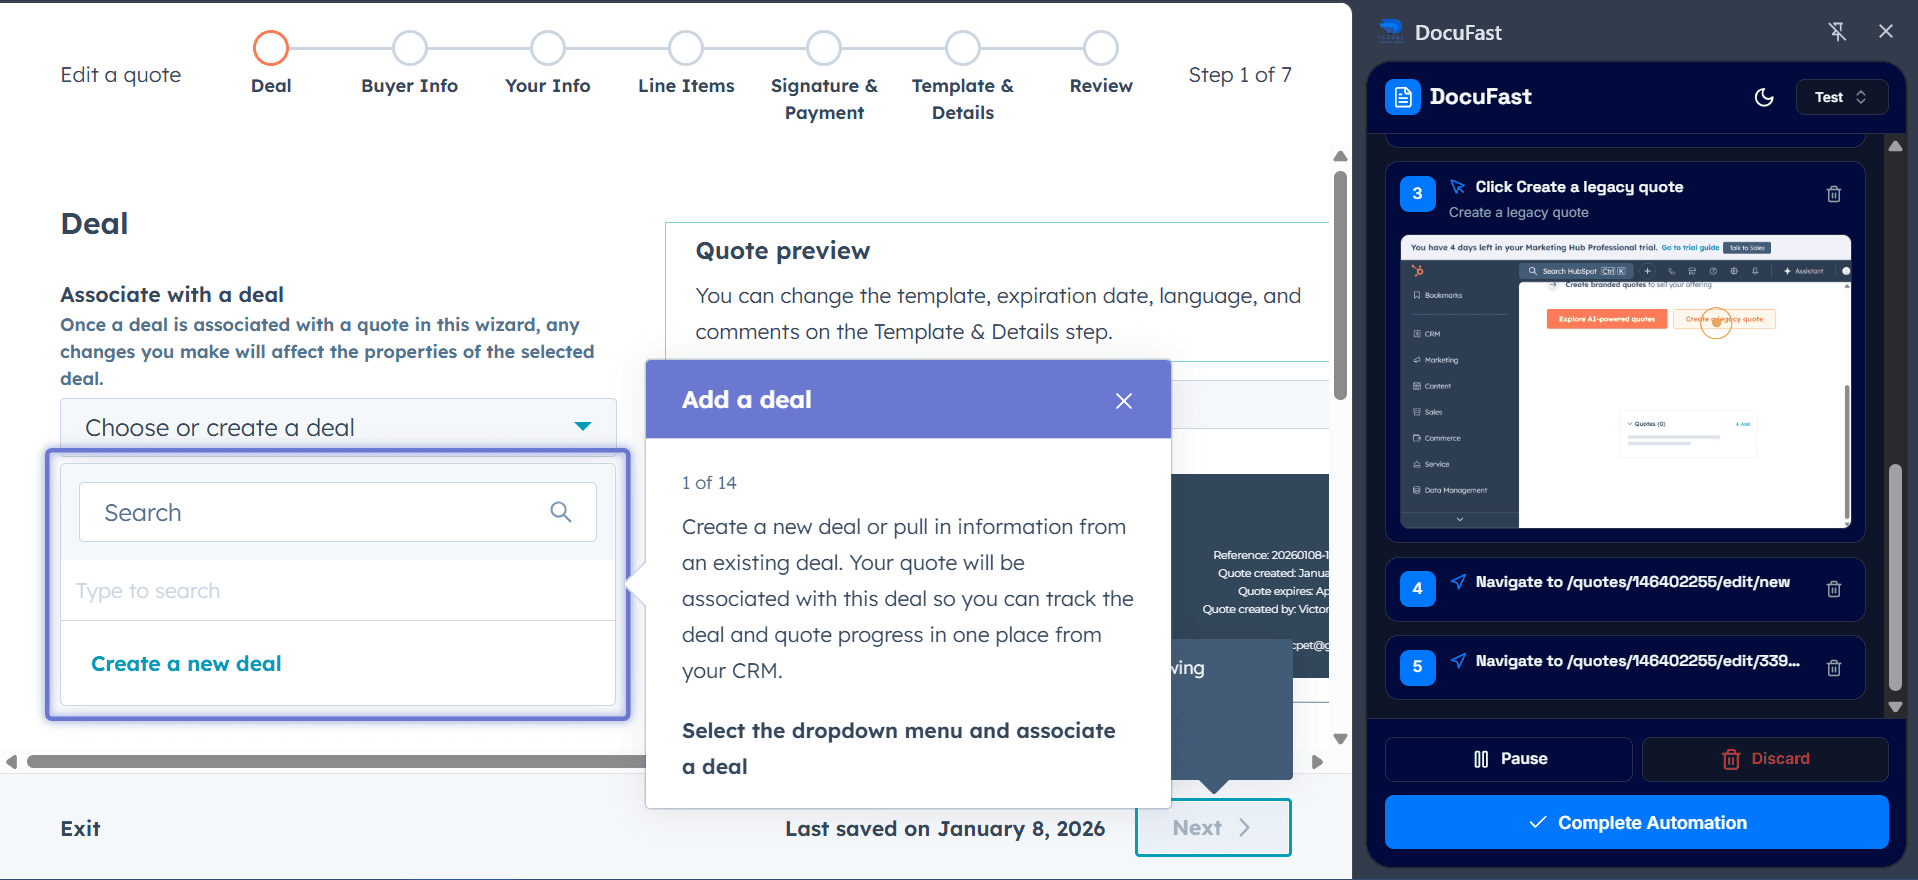
Step 4: Monitor Progress in the Sidebar
While the automation is recording, you’ll see live progress in the DocuFast sidebar. Each captured action appears as a step with a screenshot.
Step 5: Complete the Automation
Once you’ve finished the workflow, click Complete Automation. DocuFast will begin uploading and processing all captured steps. This may take a few moments, depending on the number of steps.
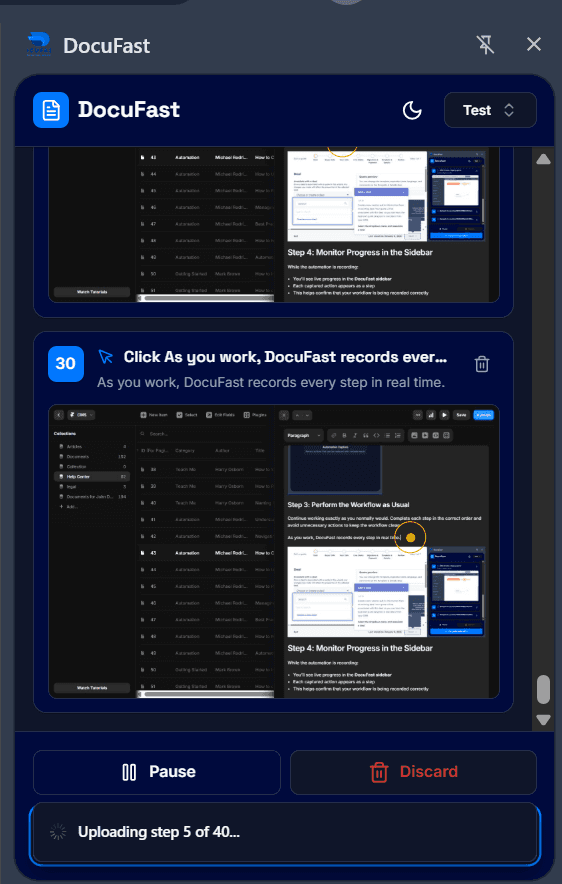
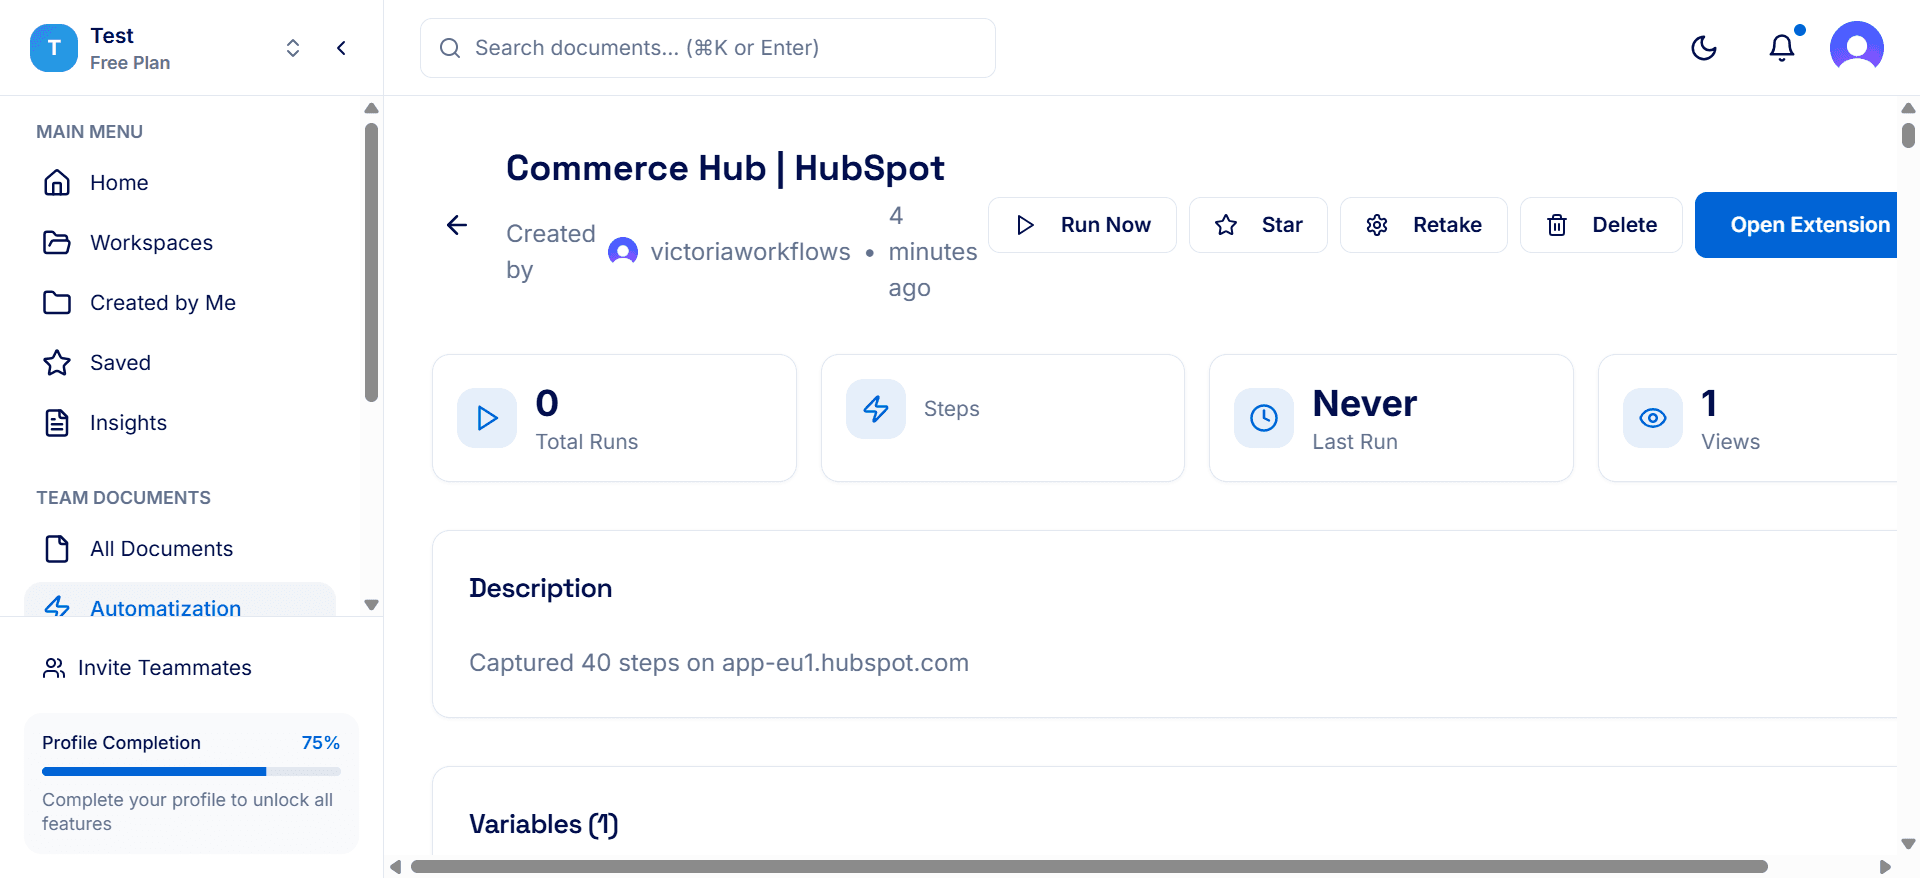
Step 6: Wait for the Upload to Finish
While DocuFast uploads the workflow, keep the page open. Once the upload is complete, your automated workflow will be saved and available in the the Automatization page.