Editing a Document
Written By:
Last Updated on May 21, 2026
Overview
After creating a document, you can easily edit its steps, titles, screenshots, and video. The editing tools allow you to refine your guide, add missing details, or update visuals for clarity.
Steps to Edit a Document
Open the document
Click on the document you want to edit.
At the top menu bar, select Edit. The editor will open in the Video Tab, switch to Document.
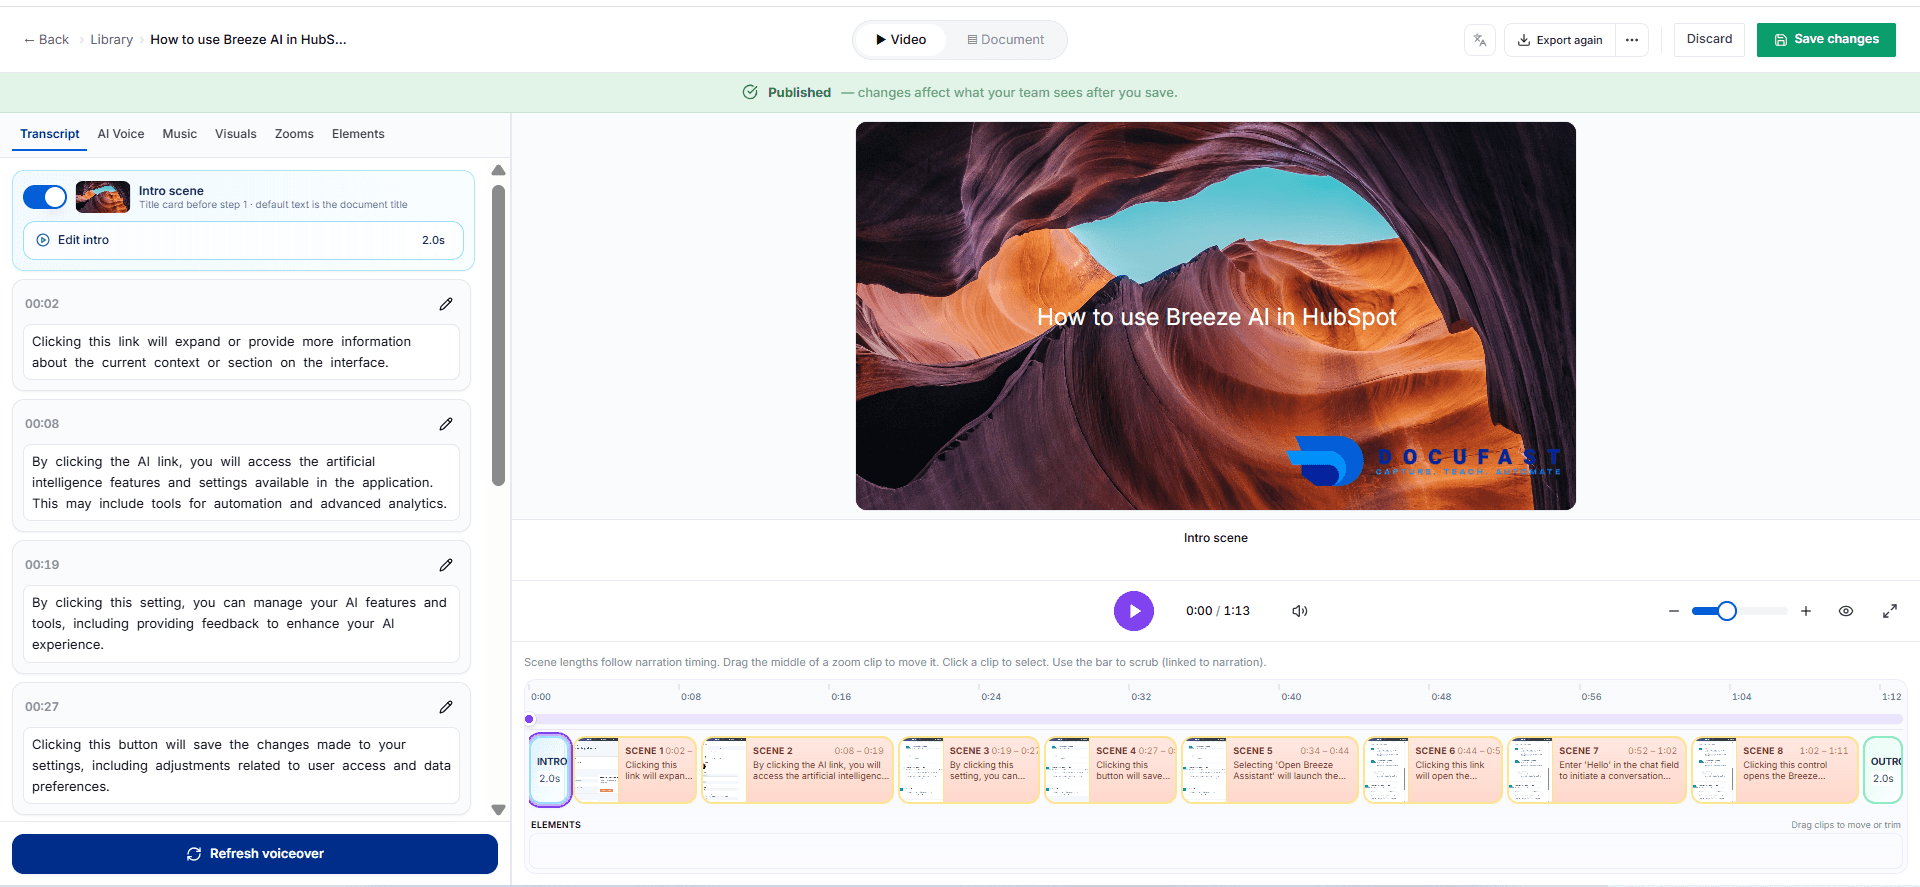
Edit steps individually
Each step can be modified. You can:
Edit document title and description
Change the step action
Edit the step instruction
Update or replace the screenshot

Add new steps manually
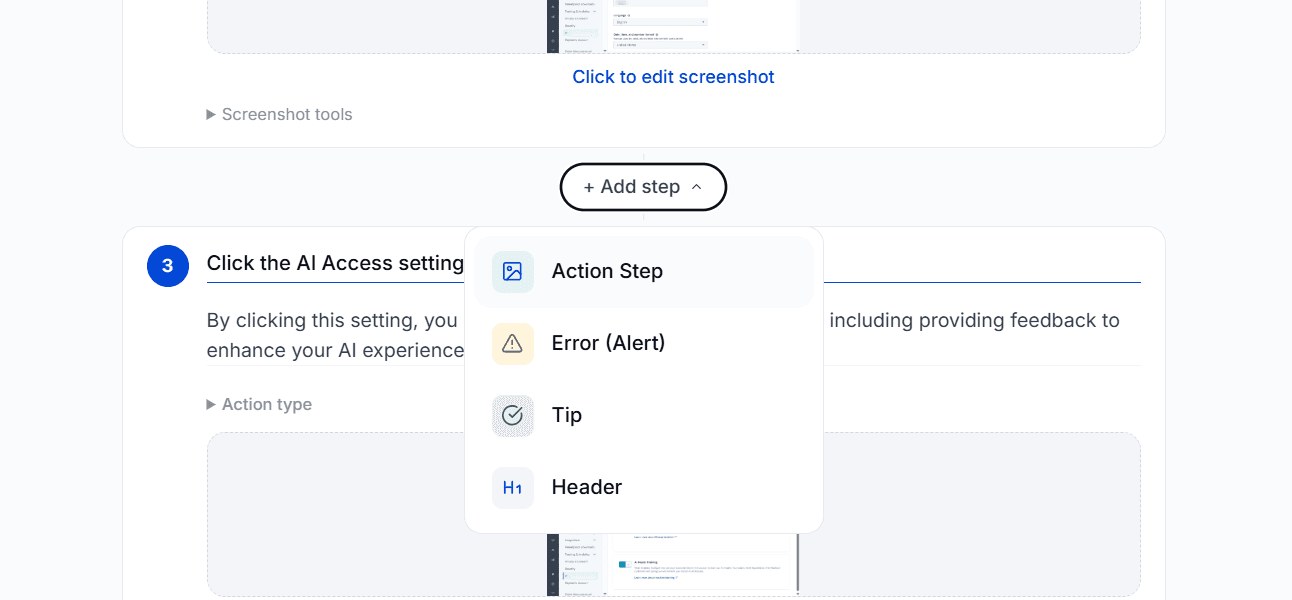
Click the plus (+ Add Step) button to add a new step. Select the type of step you want to add from the dropdown:
Action Step: Use this to add a standard instruction or action users must complete.
Error (Alert): Use this to highlight a warning, issue, or potential mistake users should avoid.
Tip: Use this to provide helpful guidance, best practices, or extra context.
Header: Use this to create section titles that help organize steps into clear sections.
Edit screenshots with the Screenshot Editor
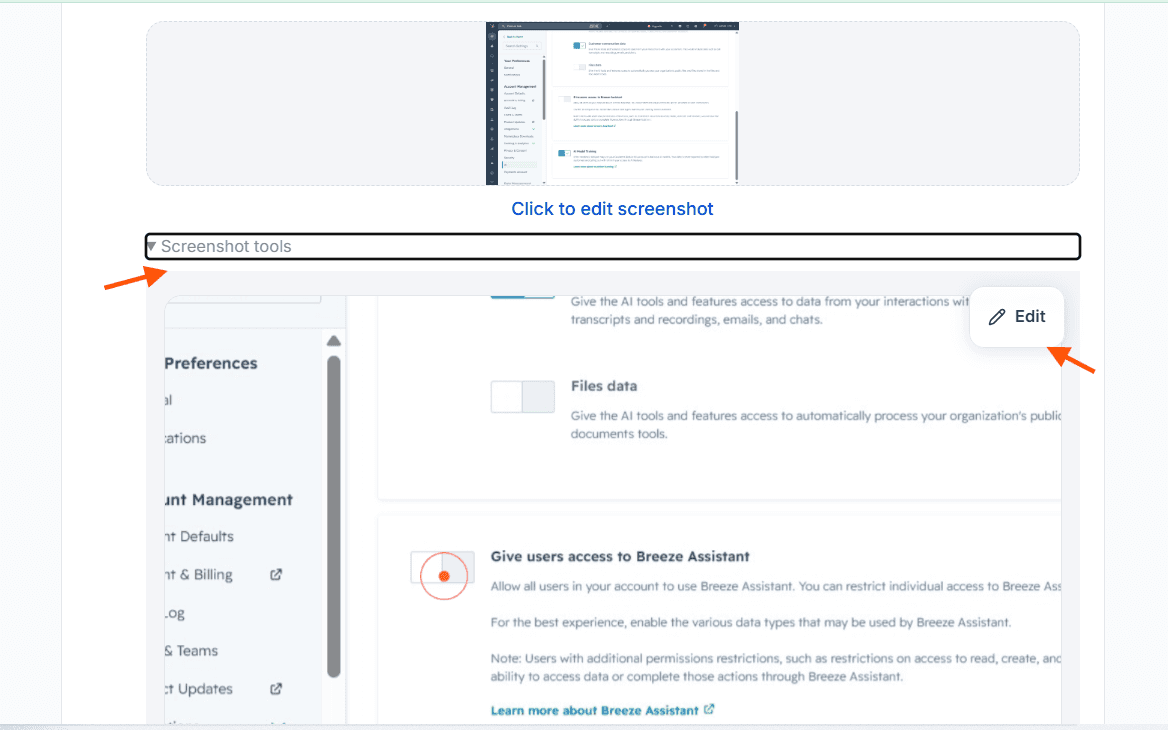
To adjust a screenshot, click the Screenshot Tools
Select Edit. The screenshot editor will open. Use the editor to:
Crop the image
Highlight important areas
Blur sensitive information
Add annotations or notes
Notes & Tips
Use clear, action-based titles for each step (e.g., “Click ‘Create Board’” instead of “Board creation”).
Keep screenshots consistent — crop out unnecessary areas and blur sensitive data.
Add missing steps manually to ensure the document matches the real workflow.
